Friday, September 21, 2012

Regenerative Endodontics

Regenerative endodontic procedures can be defined as biological procedures designed to replace damaged structures, including dentin and root structures, as well as cells of the pulp-dentin complex.

This exciting new phase of dentistry is continually evolving and becoming more predictable.  Below is a recent case.

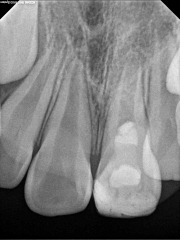
8 year old male presents for evaluation and treatment. Recent dental history includes traumatic episode, 2 weeks prior. Patient had the incisal Open Apex Startedge repaired with composite resin by restorative dentist. Tooth has become more painful in past 3 days.

Diagnostic Testing:

#8: Adequate response to cold; no pain on percussion or palpation. WNL.

#9: No response to cold; very sensitive to percussion and palpation. 3+ mobility, depressible. Purulent drainage from buccal sulcus. Open Apex (incomplete root formation)

Dx: Necrotic #9

Treatment options include: Regenerative Endodontics, One-Step Apexification, or Extraction.

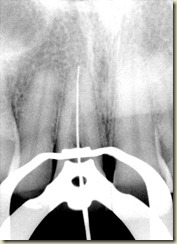
After discussing treatment alternatives with the parents and guarded prognosis, we decided to initiate root canal treatment and medicating the canal space on initial visit.Open Apex File Shot

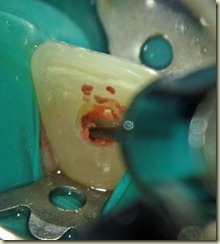
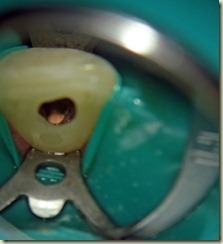
Local Anesthesia administered, tooth accessed via rubber dam isolation. Working length established of 22mm. Canal instrumented to size 100. Copious Irrigation with NaOCl; Ten min soak with

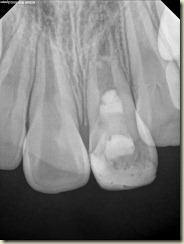
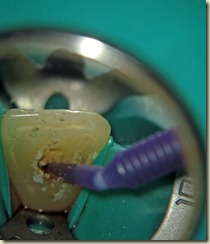
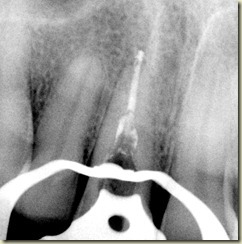
NaOCl. Canal dried. Copious Irrigation with Chlorihexidine .12%. Ten minute soak with Chlorihexidine .12%. Intracanal medicament of Calcium Hydroxide + Chlorihexidine placed using lentulospiral and appropriate sized pluggers. Access sealed permanently with composite resin.

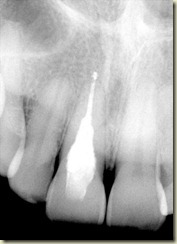
Open Apex CaOHb Radiograph at end of Visit 1:  Demonstrating CaOH Medicament

At 2 week follow-up, evaluation revealed:

#9: No pain on percussion or palpation. No mobility. No purulent Discharge.  Periodontal probing depths all within normal limits.

Decision made to proceed with Regenerative Endodontic Procedure with the goal of stimulating local stem cells to re-inhabit canal space and continue root formation for much improved long-term prognosis

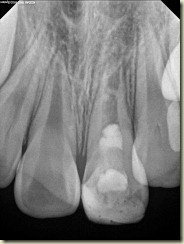
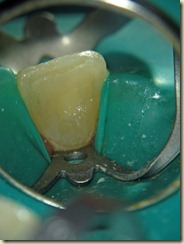
Visit 2:Local Anesthesia (Carbocaine 4% without epinephrine) administered.  Tooth accessed via rubber dam isolation.  Calcium Hydroxide removed with Hand and Rotary files.  Irrigation with .12% Chlorihexidine.  10 min soak with .12% Chlorihexidine.  Canal Dried.  Open Apex MTA Regenb

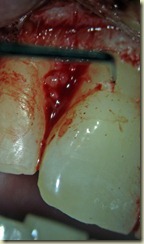
Size 100 file advanced 2-3 mm beyond apex to induce bleeding.  Canal filled with blood.  Waited 20 min for clot formation.  3 mm of MTA placed over clot.  Access restored permanently with composite resin.


UPDATE (MAY 2011)

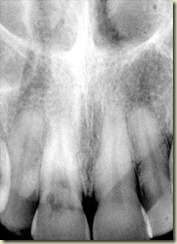
Below is a radiograph from the 6 month follow-up taken in September of 2010.  At this point, the patient has no symptoms or pain in the area.  In addition, all periodontal probing depths are WNL.

Open Apex at 6 months

No real changes noted on the 6 month radiograph.

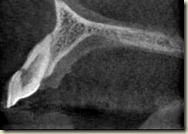
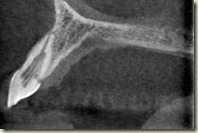
Below are two radiographs taken at the 1 year follow-up (April 2011)

Open Apex at 1 year followup

Open Apex at 1 year followupb

1 year radiographs show some calcification within the canal.  Apical width appears narrower than pre-operative radiograph, however still not formed fully.  Patient still has no pain or symptoms.  The periodontal probing depths are normal.  While this is a newer aspect of endodontics, the few literature examples demonstrate that apical closure and root formation can take upward of 24 months.  More details to follow…

Root Canal Anatomy & Complexity

Root Canal Anatomy is often believed be to either one or two canals per root.  The cartoon below demonstrates the traditional thinking. dental pulp

While this cartoon is useful for patient education, it highly underestimates the complexity of the root canal anatomy. 

Other features in addition to the main canals are lateral canals, fins, and isthmuses which join multiple canals.

Elaborate dye studies have been done to better illustrate the complexity of the root canal system.  More accurate root canal morphology is represented by the images below. 

Root Canal System


These studies demonstrate communication from the main canals laterally as well channels between the canals.

These spaces within the root canal anatomy contain pulpal tissue, and can harbor bacteria in an endodontically involved tooth.


CanalAnatomy


These spaces (lateral canals, isthmuses, and fins), must be treated in addition to the main canals.  Failure to do will result in persistent pathology and non-healing osseous lesions.  The additional lateral spaces are highly prevalent in the terminal 3mm of the root canal system.

CASE REPORT

32 year old female presented with pain in the lower left quadrant.  Dental history revealed root canal treatment were performed on #18 & #19, 8 months prior. 

Endodontic Complexity preop Diagnostic Testing revealed:

#18: Sensitive to percussion and palpation. Periodontal probings are within normal limits.  Radiograph reveals periradicular radiolucency.

#19:  No sensitivity to percussion and palpation.

While the current root canal obturation “looks” adequate, clearly bacteria are present within adjacent spaces of the root canal system.  After discussion with the patient, endodontic retreatment was decided as the appropriate treatment plan.

After adequate anesthesia, endodontic retreatment was initiated.  Previous obturation material (thermafill carriers) were removed with chloroform & hand files.  2 main canals were present.  The mesial and distal canals were cleaned and shaped to apical terminus of 40 with a .06 flare.  Copious Irrigation with NaOCl, EDTA was performed.

At this point, the tertiary features (lateral canals, fins, and isthmus) must be treated and disinfected.  This achieved by two methods:

1.)  Mechanical debridement

2.) Chemical debridement

Chemo-mechanical debridement is required to remove the smear layer, which binds to the walls of the main canals.  This debris must be removed to allow chemical antimicrobials to access the entire root canal system.

A size 15 file with a 45 degree bend is gently maneuvered along the walls of the main canals in 360 degrees.  This is done with the entire chamber filled with EDTA.  Tactile sensation is achieved as the instrument engages the lateral spaces.  After engaged, those spaces can be further enlarged with larger hand files.  In addition, chelating agents (EDTA) help dissolve and remove the smear layer.  With most cases, we employ positive/negative Endodontic Complexity check filmbirrigation system to allow the irrigation to flow to the apical portion of the root canal system.  The check film shows gutta percha and sealer sealing the entire root canal system via warm vertical condensation.

Endodontic Complexity postop2b

Final film shows a much more adequate obturation of the tooth canal system.  The access was sealed with composite resin.

Management of Endodontic Complications

A separated instrument is often considered a necessary consequence of endodontic treatment.  While modifications can be made to minimize the such events, factors such as the internal anatomy of the root canal system, cyclic fatigue of the instrument, and canal debris/impediments, make instrument separation a reality.

Use of the surgical operating microscope with straight line access to the instrument dramatically increases the change of removal and/or bypass of such instruments.

Here is a case of 54 year old man, who presented with pain in the lower left quadrant.  Endodontic treatment was performed by the referring dentist about 2 years previously.  The patient was told at that time that an instrument had separated during treatment (“broken file”) and incorporated into the root canal filling (obturation).

At time of endodontic evaluation at my office, the patient had spontaneous pain in the area as well as pain on percussion and buccal palpation related to tooth #18.

Separated Instrument preopajpg


Radiograph reveals periradicular radiolucency.  Visible calculus is also seen on the distal, beneath the crown margin. 


Separated Instrument preop2

Scanned radiograph from the referring dentist shows a different angle.  Radiolucency appears to be associated with both the mesial and distal roots of tooth #18


Separated Instrument preopcjpg


The separated instrument is highlighted here with a black circle.  Presumably, the space beyond the separated instrument contains enough pulpal reminants and bacteria to create the immune response demonstrated by the dental abscess.  Goal of further endodontic treatment is to adequately debride the entire root canal system, including the space beyond the separated instrument.


After discussing treatment options, the patient was committed to attempting to maintain the tooth (versus extraction).  The treatment plan included:  endodontic retreatment #18, access closure with composite (by referring dentist), and localized Scaling and Root Planing (by referring dentist).

After adequate anesthesia, endodontic retreatment was initiated.  Previous obturation material (gutta percha) was removed with chloroform & hand files.  Straight line access was enhanced using Glidden Gates files.  The coronal portion of the separated instrument was then visualized using the surgical operating microscope.  The microscope is an essential piece of equipment to tackle such a challenging case.  Once visualized, use of appropriately sized ultrasonic tips were used at low setting to slowly remove the dentin around the separated instrument.  Ultrasonics Separated Instrument Cone Shotprovide the ability to remove the binding dentin as well as transfer vibrational forces to the instrument, which both aid in its removal.  After a period of time, the instrument was flushed out from the root canal system, providing adequate access to the apical portion of the mesial root.  The distal root was also retreated due to the shape and position of the apical radiolucency.

There were 3 canals presents.  All 3 canals were enlarged to a size 45 terminus with an .06 taper (flare).  Regular irrigation with Sodium Hypochlorite, followed by irrigation with MTAD (Tulsa Dentsply).  Both irrigation solutions are activated using the ultrasonic handpiece and the EndoActivator (Tulsa Dentsply).  After adequate debridement, obturation was completed via warm vertical condensation.  Access was closed with IRM over 1 cotton pellet and the patient was instructed to return to his general dentist to have a composite restoration placed in the access of the crown (saving the crown as it had not been damaged during endodontic treatment), as well as localized scaling and root planing to address the visible calculus.

Separated Instrument Final Retx

Lateral canal obturation was also achieved.  Most probably, lateral canal infection contributed to the shape of periradicular radiolucency.

Saturday, August 25, 2012

Management of Internal & External Resorption

Managing resorptive lesions can be challenging with unknown outcomes.  Success depends on type of resorptive lesion (internal vs. external resorption), location of lesion, and size of the lesion.

Histologically, resorption is granulation tissue with multinucleated giant cells.  In terms of etiology, resorptive processes are usually attributed to traumatic episodes.  Dental trauma is unpredictable, and does not have to be impact trauma.  Other forms of trauma are orthodontic treatment, overheating of the dental pulp during restorative treatment (without cold water spray), and aggressive periodontal scaling.

Below is an interesting case of a primary internal resorptive lesion, which expanded and perforated the buccal and palatal aspects of the root.

45 year old female presents for evaluation of Tooth #08.  Patient had no chief complaint:  lesion was found on rouPreop radiograph1017tine dental examination.

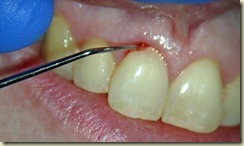
Tooth #08:  Hyperresponsive on Cold.  Slight pain on buccal palpation.  Periodontal probings are within normal limits.

Preoperative Radiograph demonstrates widened canal system.


CT Buccal Resorption002CT Palatal Resorption003

Conebeam CT Images (Courtesy of Martin Levin, DMD) demonstrate communication of internal resorption (primary) on both the buccal and palatal aspects of the root.

Preop photo exploration015

Dx: Irreversible Pulpitis with internal resorption

Tx plan:  Non-surgical root canal treatment.  Obturation will consist of gutta percha in apical 5mm of root canal system.  Fluoride-releasing composite resin (Geristore) to be placed in coronal aspect of root canal system.  Surgical explorations and repair of defect on buccal aspect of root.

DAY ONE:  NON-SURGICAL TREATMENT

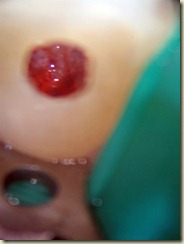
After adequate anesthesia, Tooth #08 is accessed under rubber dam isolation.  An engorged dental pulp is noted on access.

WL=21mm from incisal edge.engorged pulp004

Internal Resorption SB file shot011Removing pulp tissue019

Slow speed round bur is used to remove the pulpal tissue from the walls of the resorptive defect. 

Bleeding points are still observed-Calcium Hydroxide paste is placed.  Microbrushes are used to scrub the calcium hydroxide paste in the lateral aspects of the root canal system.

CaOH scrub001

Calcium Hydroxide is then removed with a combination of rotary files (to WL), sodium hypochlorite irrigation, and ultrasonic activation of irrigating solutions.

Upon adequate removal of all pulpal reminants, obturation can begin.

Canal is dried with microsuction and paper points.

Internal Resorption SB apical gp010

Warm Vertical Condensation with a master cone (size 45).  5 mm of gutta percha is left in the apical portion of the root canal system.  ZOE sealer is seen on the walls in the lateral aspect of the root system.  ZOE sealer is removed with a series of alcohol microbrushes.  It is important to remove the ZOE sealer as the Eugenol will inhibit the composite bonding process.Photo Apical Gutta Percha013

I also like to acid etch the dentin:  this also helps to remove any remaining ZOE sealer as well as prepare the dentin for more adequate bonding. 

Prior to Geristore placement, tenure is placed using microbrushes.


Internal Resorption SB final radiograph012Final Radiograph of obturated case.  Geristore is well placed in the coronal aspect of the canal.  The access is restore with A2 Composite Resin (Pentron BuildIt).

Final Photo Restored005

DAY TWO:  SURGICAL EXPLORATION AND REPAIR

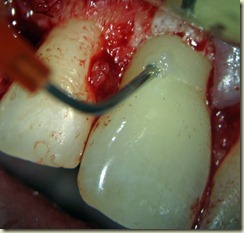
Upon raising a full thickness buccal flap,  the internally placed Geristore adequately sealed the external communication (perforation).

Photo Explorer check of Geristore014

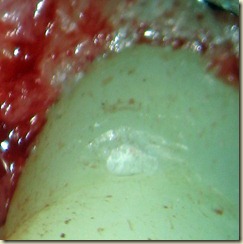
With adequate access surgically, decided to prep and add Geristore to the buccal aspect of the root.  Up close resorptive defect prepped022Geristore add006

After prepping into the Geristore shallowly, Tenure is placed and then a small amount of Geristore is added to supplement the seal. 


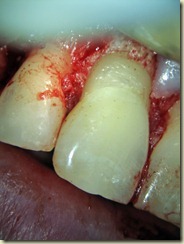
Geristore polished2008


The Geristore is then polished using fine diamonds and carbide burs.


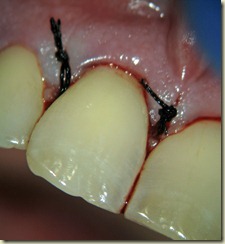
After adequate polishing, the tissue is replaced using silk sutures, which are typically removed 5 days post operatively.

Sutures pic021